
This is a step by step tutorial on how to make a speaker in Photoshop. This tutorial focuses more on Shape Tool, Layer Styles, Blending Mode and some other basic Photoshop techniques.
Let's start!
Create new file. 990 x 748px, 72dpi
Using Rounded Rectangle Tool(U) and set Radius to 150px
draw an Oblong as shown below:


Apply Gradient Overlay.


The result will look like this:

Create new Layer and apply our previous instrument used, Rounded Rectangle Tool(U) to create another oblong-shaped on top of the previous shape.

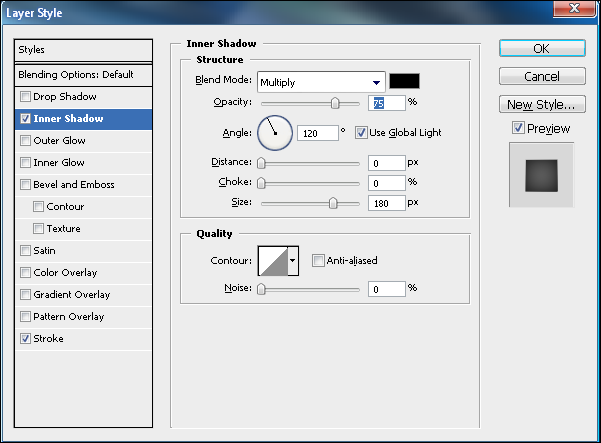
Apply Inner Shadow, Gradient Overlay and Stroke.


It should look like this:

Create new Layer.
Grab again your Rounded Rectangle Tool(U).

Apply Inner Shadow and Gradient Overlay.


Our image should look like this:
You can changed the settings of Gradient Overlay as shown in first picture.

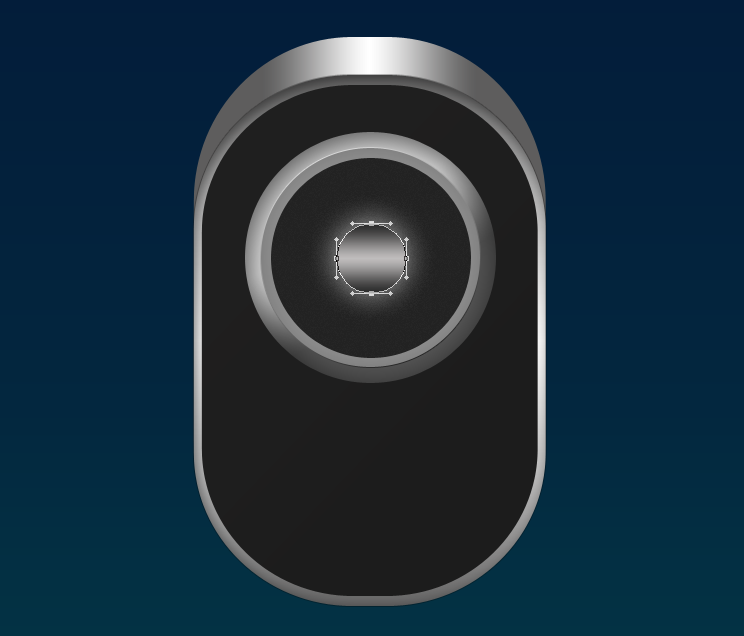
Grab you Ellipse Tool to create a circle shape. (Hold Shift and drag to create a perfect circle)

Apply Inner Shadow and Gradient Overlay.


The result should look like this:

Add new layer
Create another circle.

Apply Inner Shadow and Stroke.

And here's our image:

Create new layer.
Add circle on top of our layer with our previous instrument (U).

Apply Inner Shadow and Color Overlay.


It should look like this:

Add another circle with Ellipse Tool.

Apply Gradient Overlay.


The result:
Using Ellipse Tool (U), let's add another shape.

Apply Color Overlay.

Let's add another circle shaped (U).
Set Fill to 0%.


Apply Gradient Overlay.


Here's our initial result:

Now, let's group all circle-shaped.


Duplicate grouped layers.
Use Free Transform (T) to resize.


Hide Layers.
Create a new Layer.
Grab you Rounded Rectangular Tool set its Radius to 150px.

Apply Gradient Tool.


Grab you Rectangle Tool.

Apply Outer Glow and Inner Glow.


Add Layer Mask to hide excess fill of our Rectangle Tool.

Let's another shape using our Rounded Rectangular Tool.

Apply Gradient Overlay and Stroke.


Make selection to our previous shape then add Layers Mask by clicking on the icon as shown below.


Duplicate.
And here's the image result.

Grab your Ellipse Tool.

Apply Inner Shadow, Color Overlay and Stroke.


Duplicate three times as shown below.

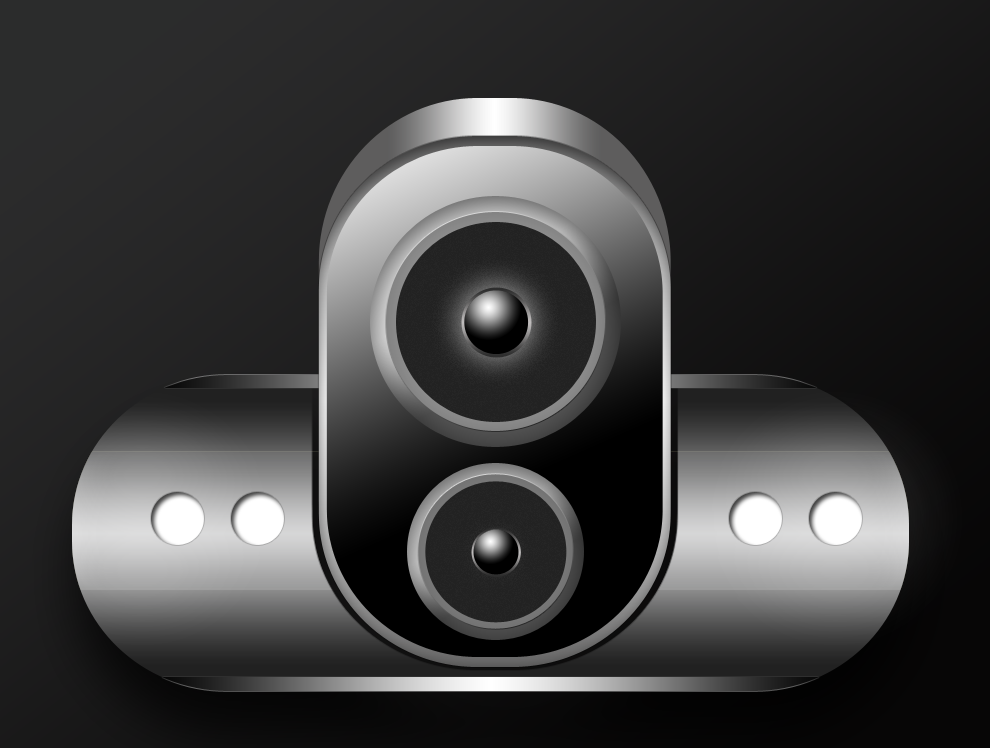
Unhide all Layers and we're good to go.
Add some details with same techniques and you're done!
The Final Result:

You can play Gradient Overlay as shown below.
DOWNLOAD PSD FILE
Enjoy and I hope you like it!
8 comments:
Just wonderful tutorial. i need some speaker cover design tutor..is it possible???
Clipping Creations India
Offshore Clipping Path
Arafin Media
Awesome, this was a really nice post. In idea I would like to put in writing like this additionally - taking time and actual effort to make a very good article.but what can I say.I procrastinate a lot and by no means seem to get something done.
Engineering Colleges in Chennai, ECE Engineering Colleges in Chennai
Kolkata escorts astute information you've incorporated the article is an amazing learning for me. I've inside and out experienced it and took in a ton. I've bookmarked your website in my web program with the objective that I can take a gander at it on various events.
Kolkata Escorts
Escorts in Kolkata
Kolkata independent escorts
Independent Kolkata escorts
Kolkata escorts to a great degree awed with the manner in which you make. The imaginativeness that you've made is basically heavenly. I've transformed into a devotee of your composed work and I've purchased in your blog to reliably read your new substance.
kolkata Escorts
Kolkata call girls
Escorts in kolkata
Call girls in Kolkata
Kolkata escorts services
Escorts services in Kolkata
Kolkata independent escorts
Independent Kolkata escorts
Kolkata escorts photos
Kolkata Call Girls photos
Kolkata escorts services
Kolkata call girls services
Leaked Indian Girls & Bhabhi Nude Images. How these Desi slut exposed and there private photos leaked on internet. nude indian girls
Shriya Saran Nude
Mia Khalifa Nude
Sonakshi Sinha Nude
Indian adultt blog
An audio editor is a bit of software program that you simply use to, amongst others, *drum rolls* edit a sound recording or sound file. Considered one of such audio editor software program is Audacity. If you want to learn more about this topic please visit https://onlineconvertfree.com
Stunning post with valuable information about illustration design. I liked the structure of this incredible blog as they are very useful and easy to read and therefore I visit this blog regularly. Thanks a lot for posting. additionally, I have a Photoshop Clipping Path Service Site Where we provide all kinds of image editing services.
Welcome to Escort Munich - the hottest and most popular escort service in Munich, this is your best place for a perfect blend of sexy massages with Zen Escort Services in the most luxurious environment for sure.
Post a Comment