June 9, 2010

Let's Go Digital, Let's Make Speaker!


This is a step by step tutorial on how to make a speaker in Photoshop. This tutorial focuses more on Shape Tool, Layer Styles, Blending Mode and some other basic Photoshop techniques.
 Let's start!


June 5, 2010

NEW Photoshop Brushes DOWNLOADS for Free


These are my own collection of Photoshop Brushes made by myself. Download for free and ready to share.
I hope you like it! ^_^

June 2, 2010

Burnt Edges World Maps


I intentionally featured these maps for Photoshop purposes. And I hope this will help to your projects as well. Different map designs but only one map source.
(click on the thumbnail for full-size image)

May 29, 2010

How to Create Your Own Glitter Brush in Photoshop


Hanging Bridge - Digital Painting 1


I'm here not with a tutorial but a digital painting. This is my best digital painting I've ever done so far. I used Corel Painter 11 for this. Like I've said in my ABOUT ME page, I'm exploring and discovering on Digital Artworks and here it is! I hope I could feature more of my works here in my blog.

Thanks for dropping by!

May 23, 2010

Picture into Digital Pieces


This tutorial shows on how to make picture into digital pieces. This is quick and easy to do but it takes time and patience to get the final result but it's worth it! (This contains monotonous process).


The Pattern


1.Create new file 50 x 50 and set its background contents to Transparent.

2.Create new Layer.

3.Zoom in for about 1200% or Fit Screen.

4.Grab your Pencil Tool and set to 1 px.
And start to draw an "L" like.


5.Select all (Ctrl + A) then go to
Edit >>Define Pattern >>name Pattern and we're done!


The Picture


1.Create new file.
Mine, I used 850 x 670.


2.Import/Place picture.


3.Now let's Rasterize the picture.
Just right click and select Rasterize from the dropdown menu.


4.Create new Layer.

5.Go to Edit >>Fill >>Pattern >>L Pattern.

The result should look like this:


6.Select your Magic Wand Tool.
And set settings shown below:


7.Choose Layer 1 and click (using Magic Wand Tool), and it creates a square selection as shown below.


8.Select picture's Layer.
Go to Layer >>New >>Layer via cut (Ctrl + Shift + J).
Hide the cut Layer to trace area which are not being cut. (Just repeat steps 6, 7 and 8).


9.Repeat steps 6,7 and 8 until you reach this picture shown below:


I got 107 Layers via cut.

10.Delete picture's Layer.


11.Hide/Delete Layer 1(which contains our Pattern) and Unhide all cut pictures as shown below:


The Background

12.Go to menu and select Gradient:


Here's our image with the background:


13.Select Move Tool and check Auto-Select.
With Auto-Select, you just have to drag and move the pieces in the work area without going to it's respective Layers.


14.Scatter and resize (some of the pieces) these tiny pictures accordingly.


15.Apply Layer Style to each pieces:
Drop Shadow and Stroke


The result should look like this:


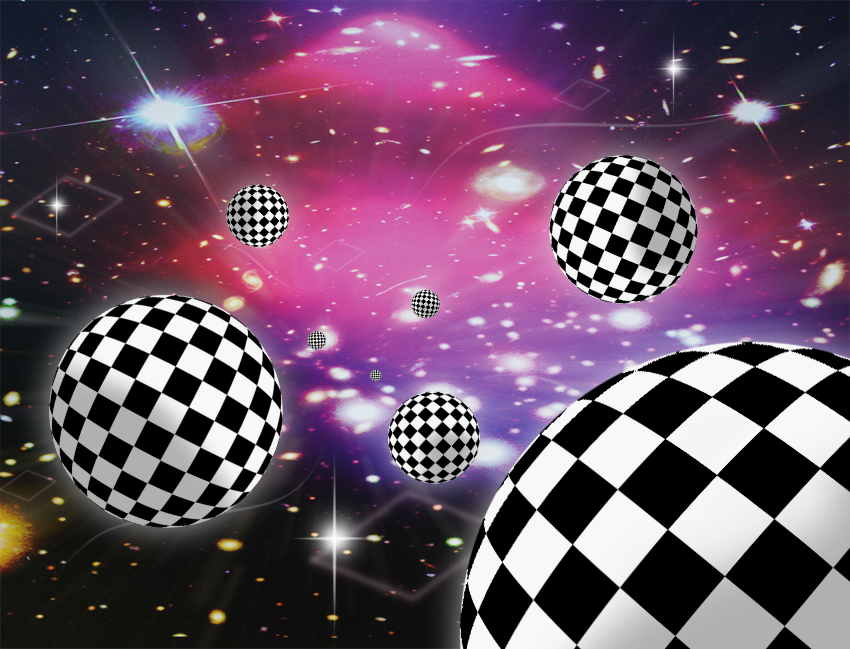
16.Add some text  and shadows.

And here's final Result:


I hope you like it!
Follow me on Facebook and Twitter for more tutorial updates.


May 20, 2010

Video Tutorial - How to Make Disco Ball in Photoshop


This first video of this tutorial shows on how to create DISCO BALL from scratch and then I used Glitter Effects to this tutorial for the shimmering light effects around our DISCO BALL to make it look like one.
DOWNLOAD PSD FILE.

Video Tutorial Part 1


 The second video focuses on the background and you can even do on your own customization to color adjustments and everything. Just be artistic and you'll see the best result better than mine.

Video Tutorial Part 2 


Thanks for watching!
I hope you like it!
Please SUBSCRIBE to my YouTube channel for more updates to my video tutorials.
DOWNLOAD PSD FILE.

Abstract Photo Manipulation - Checkered Balls in Space


In this tutorial, we will be doing and abstract Photo Manipulation. We will be using some of the basics techniques in Photoshop.
I hope you will enjoy this tutorial!
Let's start!


1.Start a new file, 850 x 670.

2.Let's add a picture for the background.
I got this from http://www.stockvault.net/.


3.Stretch to occupy our working space.


4.Duplicate background picture.

5.And then let's apply Radial Blur.
Filter >>Blur >>Radial Blur.


Here's the result:


6.Change its Blend Mode to Lighter Color.


It  should look like this:


7.Create a new Layer and name it "Balls":
8.Select Elliptical Marquee Tool, To create a perfect circle for our Selection
just hold Shift key and drag.


9.Go to Edit >Fill >Pattern >Checkered.

Result should look like this:


10.Go to Filter >>Distort >> Spherize.


It should look like this:


11.Duplicate "Balls" a couple of times or as much as you like.

Scatter and resize them randomly as shown below.


12.Select "Balls" copy and merge.


To make it a three-dimensional look:
13.Duplicate merged "Ball" Layer(s).

14.Changed its Blending Mode to Exclusion. (Making it a 3D look)
Reduce its Opacity to 45%.
Apply Layer Mask.


15.Select your Brush Tool according to the size of our balls.
Set its Hardness to 0 and start brushing.
Set Brush color to black to reveal the original image and white to hide.

Brushes Strokes  goes like this:
(click image for FULL SIZE preview)


The result will look like this:


16.Merger "Balls" Layers.


17.Duplicate "Ball" (merged) Layer again.
Let's apply Gaussian Blur(Duplicated Layer).
Filter >>Blur >>Gaussian Blur, for an outer glow effect.


18.Set its Opacity to 75%.
Move Layer down.


The result will look like this:


19.Add some Glitter Effects, objects or anything you like to make it look more Abstract
and we're done!


See related link:
How To Create CHECKERED CHESS Pattern in Photoshop.
Share |